It’s been three months of owning an airplane and last week my autopilot fell out of the panel and onto the floor on initial climb after takeoff! That sucked. But it seemed like a good time to share some of the unexpected things that broke or I didn’t catch during pre-buy inspection now that I’ve had the Tiger for 3 months. I’ll ruin the ending and say I’m very happy to own this particular airplane, but if you are buying a new-used airplane just know that these old birds aren’t perfect and small, and sometimes weird things can happen.
Houston, we have a problem
Owning an airplane can have its unexpected challenges, here are some of the bigger ones I had in the first three months.
“Don’t worry about that box, it’s not critical. It’s just the autopilot!”
This incident was the inspiration for me sharing. I was giving a Young Eagles flight to a 12-year-old aviation enthusiast. I let him make the radio call for our takeoff, we enter the runway, full power, rotate, and we’re not 200 ft into the climb and a metal box falls out of the panel, hits the kid in the leg, bounces on the floor, and slides under his seat. I watch this happen in slow motion and about 0.5 seconds later assure my young passenger that everything is okay, it’s just the autopilot and we don’t need it, but it definitely should NOT have fallen out. Thank goodness he was a kid who was not afraid of light aircraft and had been on several flights before. We continued the flight, he had the controls for a good part of cruise, and we had a great time. Yikes!
“First oil change complete, let’s go fly! Wait… what is that thingie down there?”
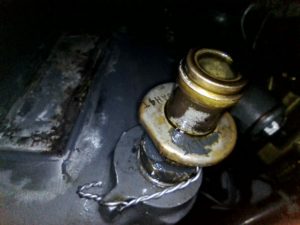
I performed the first oil change on the Grumman after about 25 hours. I was underneath the airplane making sure things were clean and tidy and noticed a little protrusion from a hole under the cowling. It’s definitely not an antenna. What is that? I touch it and it moves freely and on closer inspection I see it’s threaded. I stand up and look from the top, reach in, pick it up, and it’s a screw! What is that doing there! What could it be from? I look around the engine and see very quickly that it’s a screw to a valve cover on the #1 cylinder. I replace it, and check the rest of the valve cover screws and several of them are finger tight. I make sure they are all tight and walk away with a little worry that if those screws are secured is there something else that also wasn’t secured right.
“12 miles to the Class D. Oh $#!t! My FMS with com radios just blacked out.”
I was flying on a cold, cold winter day in Wisconsin. I was heading back to my home Class D a little early because I had to use the bathroom. Got ATIS, was getting ready to make a call to Tower. And then boom, my Avidyne screen goes black. I go through my options — get out the Sporty’s handheld radio backup, divert to the nearby untowered field, squawk 7600 and land at home. Ugh. Fortunately, a cycle of the power brought it back and I got home. When I purchased the airplane I saw the Avidyne reboot itself, the owner said it had to do with connections to wifi. And I only saw it every happen, infrequently, on the ground at startup. After this happened, I updated the Avidyne firmware (wow, it was really out of date!) and it’s been solid ever since.
“What is that rattling noise, it sounds like something’s going to fall apart!”
I started the airplane and was idling, setting up my flight plan in the GPS and waiting for the engine to come to temperature. Then I started to hear the high-pitched rattling sort of noise. At first, I was worried it was the engine and pulled back some power to see if it changed with RPMs and preparing to shutdown. Then I realized the noise was coming from behind me. I looked back and half of the interior trim around the rear window is hanging down. My beagle didn’t seem very concerned. So, I shut down, saw there were missing screws and went to fix it. I never did find the trim screws, were they ever there? So, I replaced the screws and tightened the existing ones and we’re back to good.
“It’s flickering like a disco when you turn that knob”
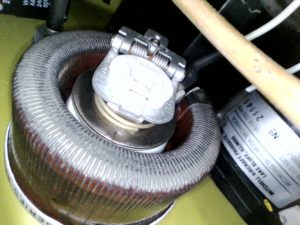
I do enjoy flying at night. The visibility is relatively good where I live, but like many I do have some worries about picking a spot for a forced landing in the unlikely event it’s necessary. The first night flight I went on I turned the rheostat for the instrument panel lights and it flickered like crazy! Fortunately, at the brightest level it was solid. This is also where I noticed the flexible neck map light (which I think is really cool though not really necessary) works intermittently but comes back if you give it a tippety-tap. I’ve since replaced the bayonet incandescent bulbs with direct replacement dimmable LEDs from Aero-Lites, cleaned the rheostat with WD-40 contact cleaner so it’s smooth operating, and cleaned and tightened the map light switch. Lights are working better than new now!
“Dad, is that thing supposed to be hanging off of the airplane wing?”
I took my son on a fun flight for sightseeing, teaching, and to let him handle the controls a bit. We flew to a local airport that has cheap(er) self-serice 100LL. We landed, taxied to the pump, and hopped out. I started paying for fuel and retrieving the hose when my son points out something weird hanging off of the wing. What is that! On closer inspection it wasn’t a snake or a plant, it was a rubber seal between the wing root fairing and the fuselage. I push it back into place the best I can, we fly back home, and it’s come out again. A little 3M 1300 glue and we’re good to go.
“This autopilot is like Zoolander, it’s not an ambiturner :(“
Unfortunately, I didn’t test the autopilot enough in the pre-buy. The wing leveler worked, and it seemed to want to track a GPS heading. But I didn’t play with all the configuration and also do much more to ensure that it engaged. So after I purchased the airplane I started to try and work it more. The wing level worked, if you turned the dial way to the left. And tracking a heading seemed to work, but it would just keep turning and not stabilize in level flight. So, the airplane likes to turn left on autopilot. The seller assured me the autopilot was just refurbished and so I didn’t look more. There is a calibration procedure that I still need to try. But the autopilot controller fell out of the panel (see above!). Maybe these things are related. To be continued.
And Just a little bit more…
And a few other bits and bobs along the way of owning an airplane:
- The cigarette lighter doesn’t work, so no charging phones yet. One day I’ll pull apart the console to find the inline fuse and check the wiring so that the expensive USB charger I purchased can be put to use.
- CHT gauge for the #3 cylinder reads low, maybe ambient? The shop said it was fixed when I reported it during pre-buy, and it was. But now it’s not working again.
- The fuel gauges have some hacky lighting. Left gauge illuminates, right gauge does not. Turns out there is an LED added in the wiring that hangs loose in the left gauge window. Will address that when I rip apart the console for the cigarette lighter.
Other than that, there are some small maintenance items and additions I didn’t think of when I purchased the plane but that needed updating, fixing, or to be added for my preference:
- Tail beacon light went out. Turns out it was the power supply and so replaced the whole thing with an LED unit from Whelen
- The glare shield was old, cracked, and wavy. The original Tiger glare shield is also way too low so you can’t see instruments at the top of the panel, which is where my audio is located. So I had to bend down to look under the eyebrow. I replaced this with the AUCountry fiberglass version which makes the panel look as nice as the rest of the airplane and is also angled up so I can see all my avionics now! I also changed the door trim with parts from Vantage Plastics and re-painted the dash cover that was fading.
- The cabin speakers were in bad shape and were cracked. There were two different models installed, which were two different sizes, and they were both from Radio Shack. It took a lot of Googling to figure that out. So I replaced them with some higher quality speakers with weatherproof mylar cones. I considered removing them completely, but I found out it’s kind of nice to listen to tower when I’m on external power. I also like the idea of backups — you know in case the four headsets I have in the airplane all decide to fail.
- I added a CO monitor. I started with the cheap card with the color changing dots. But after hearing the Dan Bass CO incident on the “There I Was…” AOPA podcast, I decided to spend a little more. I did a ton of research and decided to go with the Forensics Detectors Aircraft CO monitor. I did a ton of research on this, and landed on this because it had sensitive detection, the size/form factor was perfect for a spot on my panel, and the price was good. The one con on this one is they say the alarm isn’t very loud. But the reviews are mixed on that and where I located it is part of my normal scan and it also has the flashing light.
- The GPS database was out of date, so that’s something I just need to upload to the Avidyne regularly.
- There was no fire extinguisher in the airplane, so I purchased a small 1.3lb H3R Fire Extinguisher. Currently I just have it tucked into the rear passenger seat pocket where I can easily reach it from the pilot seat. However, the original fire extinguisher option was mounted under the seat. I’ll be designing and 3d printing a bracket to locate this under the seat when I have more time.
- I purchased a Battery Minder for my Concorde 12V battery to keep it in good shape. Also, when I first purchased the airplane I let my kids sit in it and play with the headsets and listed to ATC for too long and it was hard to start the next day. So, now I ensure it’s plugged in all the time and I added this quick disconnect harness to the battery so it’s easy to plug and unplug before and after a flight. I also don’t let the kids play with the avionics 🙂 However, there are times I want to use the avionics to perform updates or learn the buttonology and such. Having an engineering background I owned a benchtop power supply. The one I have is no longer available and has some programmability features. But it’s similar to this DC power supply. What I do is disconnect the battery and connect this power supply in its place. Some of the features that I’d recommend for a bench power supply are (1) that you can dial in 13.5 volts which is closer to what the airplance 12v bus actually carries; (2) it has a separate output switch, so you can turn on the power supply and make sure all the voltages and current is adjusted before turning on the output; (3) that it has short, overcurrent, and over heat protection and will turn off automatically. The above power supply has these features, and has good reviews, but I haven’t personally used that model.
In the end, Owning an Airplane…
This is a list of maybe a dozen things that came up, such are the joys of owning an airplane. But I’m still really happy with the airplane and the decision. I would have done some more diligence early on, especially for the autopilot because that could be small, or it could be a major expense. And of course, the control unit fell out in flight in a kids lap :/. But the structure, powerplant, controls, and all the important things have been great so far with no signs of issues.
